
singer 99k instruction manual
Welcome to the Singer 99K Instruction Manual, your comprehensive guide to mastering this versatile sewing machine. This manual covers operation, maintenance, and troubleshooting, ensuring optimal performance for both beginners and experienced users. Available as a free PDF download, it provides detailed instructions to help you get the most out of your Singer 99K.
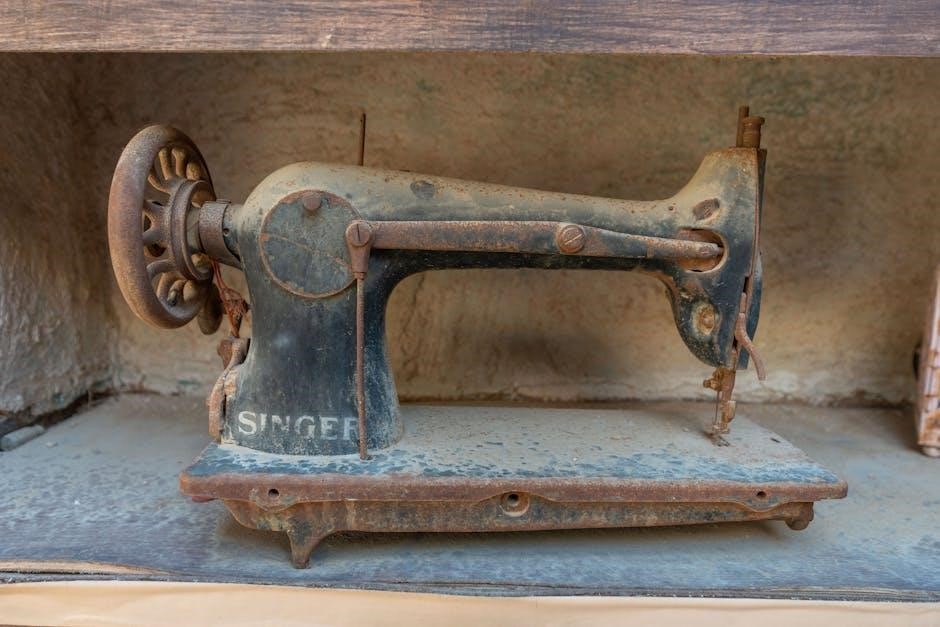
1.1 Overview of the Singer 99K Sewing Machine

The Singer 99K is a versatile and durable sewing machine designed for both hobbyists and professionals. Available in electric and hand-crank models, it was first introduced in 1950 and remains popular for its reliability. The machine supports various fabrics, from delicate textiles to heavy-duty materials, making it ideal for a wide range of sewing projects. Its numbered tension and stitch settings provide precise control, ensuring consistent results. The Singer 99K is known for its ease of use and robust construction, making it a favorite among sewers. The instruction manual offers detailed guidance to help users unlock its full potential, whether for home use or commercial purposes.
1.2 Importance of Following the Instruction Manual
Adhering to the Singer 99K Instruction Manual is crucial for optimal performance and longevity of the machine. The manual provides step-by-step guidance for setup, operation, and maintenance, ensuring safety and efficiency. Proper threading, stitch selection, and regular lubrication are essential to prevent mechanical issues. By following the manual, users can avoid common errors, maintain the machine’s durability, and achieve professional-grade results. Additionally, understanding safety precautions reduces the risk of accidents. The detailed instructions empower users to troubleshoot common problems independently, saving time and resources. Compliance with the manual ensures a seamless sewing experience, making it indispensable for both novices and experienced sewers alike.
Safety Precautions for Using the Singer 99K
Ensure a safe sewing experience by following essential precautions. Keep the work area clean, use the correct power supply, avoid loose clothing, and keep children away.
2.1 General Safety Guidelines
Always read the manual before using the Singer 99K. Ensure the machine is placed on a stable, flat surface and keep the area clear of clutter. Use the correct power supply to avoid electrical issues. Avoid wearing loose clothing or jewelry that could get caught. Keep children and pets away while sewing. Never touch the machine’s moving parts or needle with bare hands. Use the foot pedal gently and avoid overexertion. Regularly inspect the machine for damage or wear. Follow all instructions carefully to prevent accidents and ensure safe operation. Proper maintenance and understanding of stitch operations are key to a safe sewing experience.
2.2 Electrical Safety Considerations
Ensure the Singer 99K is connected to a grounded electrical outlet with the correct voltage rating. Avoid using damaged cords or plugs, as they can cause electrical hazards. Keep the machine away from water and moisture to prevent shocks. Never operate the Singer 99K near water sources or in humid environments. If the machine malfunctions, disconnect it immediately and contact a professional. Use only Singer-approved attachments and avoid overloading the machine, as this can strain the motor. Regularly inspect the power cord for signs of wear and replace it if necessary. Always follow the manufacturer’s electrical guidelines to ensure safe and reliable operation of your Singer 99K sewing machine.

Assembly and Basic Setup of the Singer 99K
Unpack and inspect the Singer 99K, ensuring all components are included and undamaged. Follow step-by-step assembly instructions to set up your machine correctly for seamless operation.
3.1 Unpacking and Initial Inspection
When you receive your Singer 99K, carefully unpack the machine and accessories. Inspect for any visible damage or missing parts. Ensure all components, such as the sewing machine, power cord, and attachments, are included. Refer to the manual’s inventory list to confirm completeness. Examine the machine for scratches or dents, and test the power cord for integrity. Familiarize yourself with the parts, such as the presser foot, bobbin compartment, and stitch selectors. If any issues are found, contact customer support immediately. Proper inspection ensures a smooth setup and operation experience. This step is crucial for both new and experienced users to guarantee optimal performance from the start.

3.2 Step-by-Step Assembly Instructions

Begin by attaching the foot controller and connecting the power cord securely. Next, align the sewing machine head with the base and screw it into place, ensuring stability. Attach any additional accessories, such as the extension table or specialized feet, according to the manual’s guidelines. Tighten all connections firmly but avoid over-tightening. Plug in the machine and perform a test stitch on scrap fabric to ensure proper function. Refer to the torque specifications in the manual for precise assembly. Double-check all parts for correct alignment and stability before first use. Proper assembly ensures safe and efficient operation of your Singer 99K sewing machine.
Operating the Singer 99K Sewing Machine
Start by threading the machine and selecting your desired stitch type. Use the foot pedal to control speed, ensuring smooth fabric movement. Adjust tension as needed for optimal results.
4.1 Threading the Machine
Threading the Singer 99K is straightforward when following the manual’s guidance. Begin by raising the presser foot and locating the take-up lever. Gently pull the thread through the tension discs, then guide it through the take-up lever and needle. Ensure the thread is seated properly in the tension spring. Once threaded, lower the presser foot and test the stitch on scrap fabric. Proper threading ensures even stitch formation and prevents machine jamming. Refer to page 25 for detailed illustrations and steps to achieve correct thread placement and tension. Always use high-quality thread suitable for your fabric type to maintain optimal performance. Regularly check and rethread as needed for consistent results.
4.2 Selecting and Using Stitches
The Singer 99K offers a variety of stitches to suit different sewing projects. Use the stitch selector dial to choose from straight, zigzag, or decorative stitches. Always refer to the stitch chart in the manual for guidance. For straight stitching, set the dial to position 1; For zigzag, select position 2 and adjust the width using the stitch width knob. Decorative stitches, such as the scallop or stretch stitch, are ideal for embellishing fabrics. Ensure the presser foot matches the stitch type for optimal results. Experiment with different stitch lengths and widths to achieve the desired effect. Testing stitches on scrap fabric before sewing your final project ensures accuracy and satisfaction. This feature makes the Singer 99K versatile for both practical and creative sewing tasks. Proper stitch selection enhances the quality and durability of your work. Always follow the manual’s recommendations for thread type and needle size to maintain machine performance. Regularly cleaning the bobbin area and ensuring proper thread tension will prevent issues during stitching. By mastering the stitch selection process, you can unlock the full potential of your Singer 99K sewing machine and create professional-looking projects with ease.
4.3 Basic Sewing Techniques
Mastering basic sewing techniques with the Singer 99K ensures smooth and professional results. Begin by raising the presser foot before starting to sew. Always use the appropriate presser foot for the fabric type to maintain even feeding. For straight seams, align the fabric edge with the machine’s edge guide. Backstitch at the beginning and end of seams for durability. When sewing curves or delicate fabrics, reduce the stitch length for better control. Use the handwheel to manually position the needle for precise starts and stops. Ensure fabric is taut but not stretched to prevent distortion. For heavier fabrics, use a walking foot or Teflon foot for easier gliding. Maintain consistent seam allowances for uniform results. These techniques will enhance your sewing experience and the quality of your projects.
Maintenance and Troubleshooting
Regularly clean and lubricate your Singer 99K to ensure smooth operation. Refer to the manual for troubleshooting common issues like thread breakage or uneven stitching.
5.1 Regular Maintenance Tips
Regular maintenance ensures your Singer 99K runs smoothly. Clean the bobbin area and feed dogs regularly to remove lint and debris. Lubricate moving parts with Singer Motor Lubricant to prevent friction. Replace the needle after every major project to maintain stitch quality. Check and adjust the stitch tension periodically to ensure even stitching. Oil the machine’s internal mechanisms as instructed to keep it in optimal condition. Always unplug the machine before performing maintenance. Store the machine in a dry, cool place to prevent rust and damage. Following these tips extends the life of your Singer 99K and ensures consistent performance.
5.2 Common Issues and Solutions
Common issues with the Singer 99K include thread jamming, uneven stitching, and machine noise. For thread jams, clean the bobbin area and re-thread the machine. Uneven stitching can be resolved by adjusting the stitch tension or replacing the needle. If the machine is noisy, ensure all parts are properly lubricated. Consult the manual for specific lubrication points. If the machine does not power on, check the power cord and electrical connections. For persistent issues, refer to the troubleshooting section or contact Singer support. Regular maintenance, as outlined in the manual, can prevent many of these problems. Always follow the manufacturer’s guidelines for repairs and adjustments to ensure optimal performance and longevity of your Singer 99K sewing machine.
Advanced Features and Customization
Explore advanced features like customizable stitch settings and interchangeable attachments. Tailor your sewing experience by adjusting stitch length, width, and tension for precise results on various fabrics and projects.
6.1 Using Attachments and Accessories
The Singer 99K offers a variety of attachments and accessories to enhance your sewing experience. These include zipper feet, buttonhole attachments, and hemming guides, which expand the machine’s functionality. To use attachments, align them with the presser foot and secure them as instructed in the manual. Each attachment is designed for specific tasks, such as precise zippers or decorative stitching. Regularly clean and store attachments to maintain their performance. For detailed guidance, refer to the manual or Singer’s official website for tutorials and support resources to maximize your machine’s potential. Proper use ensures versatility and professional-quality results.
6.2 Customizing Stitch Settings
Customizing stitch settings on the Singer 99K allows you to tailor your sewing projects with precision. The machine offers adjustable stitch length, width, and tension, enabling you to achieve the desired results for various fabrics. To customize, access the stitch settings via the numbered dial or tension controls. For decorative stitching, select from predefined patterns or manually adjust settings. Proper thread tension ensures even stitching, while stitch length adjustments accommodate different fabric thicknesses. Regularly review the manual for specific guidance on customizing settings for optimal performance. This feature enhances versatility, making the Singer 99K suitable for both basic and intricate sewing tasks. Always test settings on scrap fabric before starting your project.
Mastering the Singer 99K sewing machine is now within your reach with this comprehensive manual. For further assistance, visit Singer’s official website or download PDF manuals from trusted sources like Ismacs. These resources offer detailed guides, troubleshooting tips, and maintenance advice. Explore community forums and sewing groups for shared experiences and creative ideas. Regularly updating your skills ensures you maximize the machine’s potential. Happy sewing!