

everstart battery charger manual
Welcome to the EverStart Battery Charger Manual! This guide provides essential information for safe and effective use of your EverStart battery charger. Learn about its features, proper operation, and maintenance to ensure optimal performance and longevity.
1.1 Overview of the EverStart Battery Charger
The EverStart Battery Charger is a versatile and reliable charging solution designed for various automotive and marine batteries. It features microprocessor control, LED indicators, and multiple charging modes to ensure safe and efficient charging. Compatible with 6V and 12V batteries, it supports standard, maintenance, and rapid charging. Models like the BC3E and BC50BE offer advanced features such as reverse polarity protection and thermal monitoring for enhanced safety and performance.
1.2 Importance of Reading the Manual
Reading the manual is essential for understanding your EverStart Battery Charger’s operation, safety, and maintenance. It provides critical information on proper usage, charging modes, and troubleshooting. By following the guidelines, you ensure safe charging, prevent battery damage, and optimize performance. The manual also helps you identify and resolve common issues, maximizing the lifespan of both the charger and your battery. Always refer to it before use.
1.3 Safety Precautions and Warnings
Always follow safety guidelines when using the EverStart Battery Charger to prevent accidents. Ensure proper ventilation to avoid hydrogen gas buildup. Connect clamps correctly to avoid reverse polarity, which can cause damage or sparks. Keep the charger away from flammable materials and avoid modifying it. Never use damaged cables or batteries, as this can lead to electrical hazards. Adhere to all warnings to ensure safe operation.
Features and Functionalities of the EverStart Battery Charger
The EverStart Battery Charger offers advanced features like microprocessor control, multiple charging modes, and LED indicators for status monitoring. It supports various battery types, including AGM, GEL, and WET, ensuring versatile compatibility. The charger also features automatic shut-off to prevent overcharging and is built with durable materials for long-lasting performance.
2.1 Technical Specifications and Compatibility
The EverStart Battery Charger models, such as the BC3E and BC50BE, offer versatile charging solutions. With ratings like 3 Amp, 15 Amp, and 40 Amp, they support 6V and 12V systems. Compatible with AGM, GEL, and WET batteries, these chargers feature microprocessor control for precise charging. The BC50BE includes an LCD display for monitoring charge levels and modes, ensuring compatibility with automotive and marine applications.
2.2 Charging Modes and Settings
The EverStart Battery Charger features multiple charging modes to suit various needs. Modes include Engine Start for high-current boosting, Rapid Charge for quick energy replenishment, and Maintenance Charge for long-term storage. Settings are easily adjustable via the LCD display, ensuring compatibility with AGM, GEL, and WET batteries. These modes provide flexibility for different vehicle types and charging requirements.
2.3 Advanced Features (e.g., Microprocessor Control, LED Indicators)
The EverStart Battery Charger is equipped with advanced features like microprocessor control, ensuring precise charging and automatic adjustments for optimal performance. LED indicators provide real-time status updates, such as charging progress, error detection, and completion alerts. These features enhance safety, efficiency, and user convenience, making the charger suitable for a wide range of battery types and applications.
Installation and Setup of the EverStart Battery Charger
Unpack and inspect the charger, ensuring all components are included. Prepare the battery by cleaning terminals and placing it on a stable surface. Follow manual instructions for proper installation and setup to ensure safe and efficient charging.
3.1 Unpacking and Initial Inspection
Carefully unpack the EverStart Battery Charger and verify all components are included, such as clamps, cables, and the charger unit. Inspect for any visible damage or wear. Ensure the charger is in working condition and all accessories are undamaged. If any issues are found, contact customer support immediately before proceeding with installation. Proper inspection ensures safe and reliable operation.
3.2 Preparing the Battery for Charging
Before charging, ensure the battery terminals are clean and free from corrosion. Secure all connections to prevent loose contacts. Verify the battery type (e.g., AGM, GEL, WET) and voltage to match the charger’s settings. Always refer to the manual for compatibility and safety guidelines to avoid damage or hazards. Proper preparation ensures efficient and safe charging.
3.3 Mounting and Placement Recommendations
Place the EverStart battery charger on a stable, heat-resistant surface in a well-ventilated area. Ensure it is away from flammable materials and direct sunlight. Secure the charger to prevent movement during operation. Avoid exposing it to moisture or extreme temperatures. Proper placement ensures safety, efficiency, and longevity of both the charger and battery. Always follow the manual’s guidelines for optimal setup.
Connecting the EverStart Battery Charger
Connect the EverStart battery charger by attaching the red clamp to the positive terminal and the black clamp to a grounded metal surface or negative terminal. Always ensure proper polarity to avoid damage or safety hazards. Select the correct charging settings based on your battery type and follow the manual’s connection guidelines for safe operation.
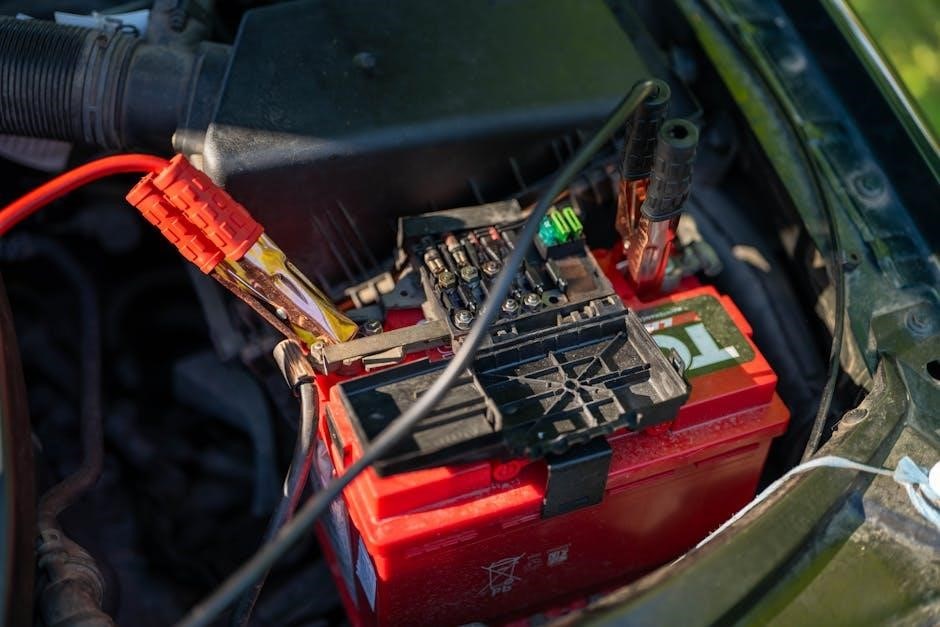
4.1 Attaching the Clamps to the Battery
Always connect the positive (red) clamp to the battery’s positive terminal first, followed by the negative (black) clamp to a grounded metal surface or the negative terminal. Ensure proper polarity to prevent damage or safety hazards. Double-check connections before powering on the charger. Refer to the manual for specific guidelines on clamp placement and safety precautions.
4.2 Selecting the Correct Charging Settings
Choose the appropriate charging mode based on your battery type (e.g., AGM, GEL, or WET) and its voltage (6V or 12V). Use the LED indicators to verify the selected mode. For standard charging, select the 3A setting, while the 15A or 40A settings are ideal for rapid charging. Always refer to the manual for specific recommendations to ensure safe and efficient charging.
4.3 Ensuring Proper Polarity and Connections
Always connect the positive (red) clamp to the positive terminal and the negative (black) clamp to the negative terminal or a grounded metal surface. Reverse polarity can trigger alarms and damage the charger. Double-check connections to avoid errors. Ensure clamps are secure to prevent sparks or short circuits. Proper connections are crucial for safe and effective charging.
Charging Instructions and Guidelines
Follow the standard charging procedure for safety and effectiveness. Select the appropriate mode based on battery type and monitor the process closely using LED indicators. Always adhere to guidelines to ensure proper charging and maintain battery health.
5.1 Standard Charging Procedure
The standard charging procedure involves connecting the charger to the battery, selecting the appropriate mode, and monitoring the process. Ensure correct polarity: connect the positive (red) clamp to the positive terminal and the negative (black) clamp to the negative terminal or a grounded metal surface. Use the LED indicators to track charging status and ensure the battery reaches full charge safely. Always follow the manual for specific instructions.
5.2 Maintenance Charging for Long-Term Storage
For long-term storage, use the maintenance charging mode to keep the battery at a stable charge level. This prevents sulfation and extends battery life. Set the charger to the 3-amp maintenance mode and ensure the battery is stored in a cool, dry place. Periodically check the charge level and reconnect the charger as needed to maintain optimal voltage. Always refer to the manual for specific settings.
5.3 Monitoring the Charging Process
Regularly monitor the charging process using the LED indicators or LCD screen on your EverStart charger. These displays show real-time data, such as charge level, voltage, and current. Listen for audible alarms, which signal issues like reverse polarity or overcharging. Always check the manual for specific guidelines on interpreting these indicators to ensure safe and efficient charging. This helps prevent overcharging and extends battery life.

Troubleshooting Common Issues
Identify and resolve issues like error codes, alarms, or charging failures. Check connections, ensure proper polarity, and review the manual for detailed solutions to common problems.
6.1 Diagnosing Error Codes and Alarms
The EverStart charger displays error codes and alarms to indicate issues. Codes like “E1” or “E2” signal problems such as reverse polarity or over-voltage. Refer to the manual for specific code meanings. Alarms sound for improper connections or charging errors. Check the LED indicators or LCD screen for detailed issue identification and follow the manual’s troubleshooting guide to resolve them effectively.
6.2 Resolving Common Charging Problems
Common issues like improper connections or a dead battery can disrupt charging. Check clamps for secure attachment and ensure correct polarity; If the charger shows no power, verify the outlet or extension cord. For slow charging, inspect the battery terminals for corrosion. Allow overheated batteries to cool before resuming. Always refer to the manual for specific solutions tailored to your EverStart model.
6.3 Resetting the Charger and Battery
If the charger or battery malfunctions, resetting can often resolve the issue. Disconnect the battery and charger from the power source, then wait 30 seconds. Reconnect the battery first, followed by the charger. For some models, pressing and holding the reset button (if available) can restore normal operation. Always refer to your specific model’s manual for detailed reset instructions.
Understanding the LED Indicators and Alarms
The LED indicators on your EverStart battery charger provide critical status updates, such as charging progress, error codes, and completion notifications. Alarms alert you to potential issues.
7.1 Interpreting LED Status Lights
The EverStart battery charger features LED status lights that indicate various modes and conditions. A steady green light often signifies a successful charge, while a flashing red light may signal an error or issue. Refer to the manual to decode each light’s meaning, ensuring proper operation and troubleshooting; Always check the LED indicators during and after charging.
7.2 Understanding Audible Alarms and Alerts
The EverStart battery charger is equipped with audible alarms to alert you of specific conditions. For instance, a continuous beep may indicate reverse polarity, while intermittent beeps could signal a charging error. These alarms are designed to ensure safe operation and prompt corrective action. Always refer to the manual to identify and resolve the cause of an alarm promptly.
7.3 Responding to Alarm Conditions
When an alarm sounds, promptly identify and address the issue. Check connections for polarity errors or loose clamps. If the alarm persists, disconnect the charger and consult the manual or contact support. Always prioritize safety and follow the recommended procedures to resolve the issue efficiently.

Maintenance and Care of the EverStart Battery Charger
Regularly clean the charger and inspect for damage. Update firmware as needed for optimal performance. Store the charger in a dry, cool place when not in use.
8.1 Cleaning and Inspecting the Charger
Regularly clean the EverStart Battery Charger using a soft, dry cloth to remove dirt and debris. Avoid harsh chemicals or abrasive materials that may damage the surface. Inspect the charger for visible damage, such as frayed cords or broken connectors. Check the vents for blockages to ensure proper airflow. Replace any damaged parts immediately to maintain performance and safety.
8.2 Updating Firmware or Software
Regular firmware updates ensure your EverStart Battery Charger operates efficiently. Check the manufacturer’s website for the latest software version. Download and install updates following the provided instructions. Avoid interrupting the update process to prevent potential malfunctions. Updated firmware enhances performance, adds features, and improves compatibility with various battery types. Always verify the authenticity of the source before proceeding with any software updates.
8.3 Storing the Charger When Not in Use
When storing the EverStart Battery Charger, ensure it is clean and dry. Place it in a cool, well-ventilated area away from direct sunlight and extreme temperatures. Avoid exposing it to moisture or humidity; Disconnect all cables and store them separately to prevent damage; If the charger has a built-in battery, recharge it every few months to maintain its health.
Warranty and Support Information
Your EverStart Battery Charger is backed by a limited warranty. For details, contact customer support or visit the official website for resources and assistance.
9.1 Warranty Terms and Conditions
Your EverStart Battery Charger is covered by a limited warranty, typically lasting 3 years, depending on the model. The warranty covers defects in materials and workmanship. For full details, refer to the manual. Exclusions include misuse or normal wear. Contact customer support for warranty-related inquiries or claims. Proper registration may be required for warranty activation.
9.2 Contacting Customer Support
For assistance with your EverStart Battery Charger, contact customer support via phone at 1-800-xxx-xxxx or email at support@everstart.com. Live chat is also available on the official website. Visit the EverStart website for additional resources, FAQs, and troubleshooting guides. Have your product model number ready for quicker service.
9.3 Accessing Online Resources and Manuals
Visit the official EverStart website or platforms like ManualsLib and ManualsPlus to access digital versions of your battery charger manual. Use the search bar to find your specific model, such as the BC3E or BC50BE. Downloadable PDFs are available for easy reference, ensuring you have all the information you need at your fingertips;
Congratulations! You’ve completed the EverStart Battery Charger Manual. Always use the correct settings for your battery type, follow safety guidelines, and store the charger properly to maximize its lifespan. Refer to the manual for specific model instructions and troubleshooting.
10.1 Best Practices for Using the Charger
For optimal performance, always use the correct charging mode for your battery type; Regularly inspect the clamps and cables for damage. Ensure the charger is placed on a stable, heat-resistant surface. Avoid overcharging by monitoring the LED indicators. Keep the charger away from flammable materials and follow all safety precautions outlined in the manual.
10.2 Avoiding Common Mistakes
To ensure safe and effective charging, avoid common mistakes such as reversing polarity, overcharging, or using damaged cables. Always follow the manual’s guidelines, monitor charging progress, and keep the charger away from flammable materials. Properly maintain the battery and charger to prevent issues and extend their lifespan.
10.3 Maximizing Battery and Charger Lifespan
To maximize the lifespan of your EverStart battery and charger, ensure proper charging cycles, avoid overcharging, and store the battery in a cool, dry place. Regularly inspect cables and connections for damage, and follow the manual’s maintenance guidelines. Avoid extreme temperatures and always use the charger as specified to prevent premature wear and extend longevity.