
drywall installation guide pdf
Drywall installation is a fundamental skill in modern construction‚ offering a cost-effective solution for smooth walls and ceilings. Comprehensive guides and manuals provide step-by-step instructions‚ ensuring professional results.
Overview of Drywall and Its Importance
Drywall‚ also known as gypsum board‚ is a popular construction material used for walls and ceilings. Made from gypsum plaster sandwiched between two layers of paper‚ it offers fire resistance‚ soundproofing‚ and a smooth surface for finishing. Its lightweight and easy installation make it a cost-effective solution for modern building projects. Drywall is essential for creating durable‚ versatile‚ and aesthetically pleasing interior spaces‚ making it a cornerstone in both residential and commercial construction. Comprehensive guides provide detailed insights into its installation and benefits.
Benefits of Using Drywall in Construction
Drywall offers numerous advantages in construction‚ including fire resistance and soundproofing. Its lightweight design simplifies installation‚ reducing labor costs and time. Drywall creates smooth surfaces ideal for painting and finishing‚ enhancing interior aesthetics. It is also cost-effective compared to traditional materials. Additionally‚ drywall is durable and versatile‚ suitable for both walls and ceilings. These benefits make it a preferred choice for modern building projects‚ as highlighted in various installation guides and manuals available online.

Materials and Tools Needed for Drywall Installation
Essential materials include drywall panels‚ joint tape‚ and compound. Tools like utility knives‚ t-squares‚ and screwdrivers are necessary for cutting‚ handling‚ and securing drywall effectively.
Essential Drywall Panels and Accessories
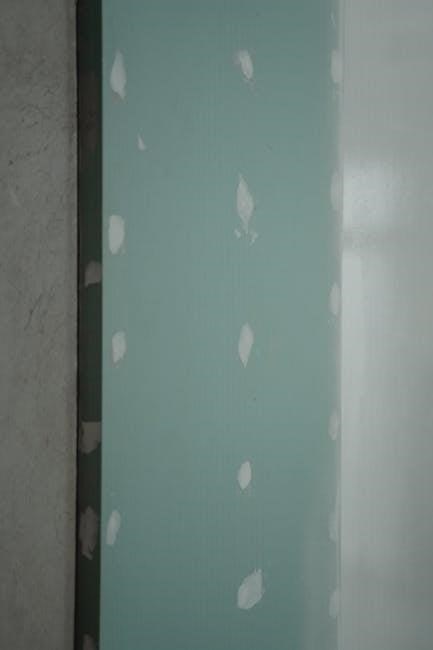
Standard drywall panels are available in various thicknesses‚ with 1/2-inch being the most common. Fire-rated and moisture-resistant options are also available for specific needs. Essential accessories include joint tape for seamless joints‚ corner beads to reinforce edges‚ and drywall screws for secure fastening. Additional items like sealants and adhesive compounds ensure durability and a smooth finish. These materials and accessories are crucial for achieving professional-grade drywall installation‚ as outlined in detailed installation guides and manuals.
Tools Required for Cutting‚ Handling‚ and Finishing Drywall
Essential tools for drywall installation include utility knives for scoring‚ T-squares for straight cuts‚ and saws or routers for intricate shapes. A drill with drywall bits aids in pre-drilling holes. For handling‚ lifters or dollies are used to maneuver heavy panels. Finishing requires taping knives for applying joint compound and sanders for smoothing surfaces. Additional tools like corner rollers and mud pans enhance efficiency. These tools ensure precise cuts‚ secure fastening‚ and a polished finish‚ as detailed in installation guides and manuals.
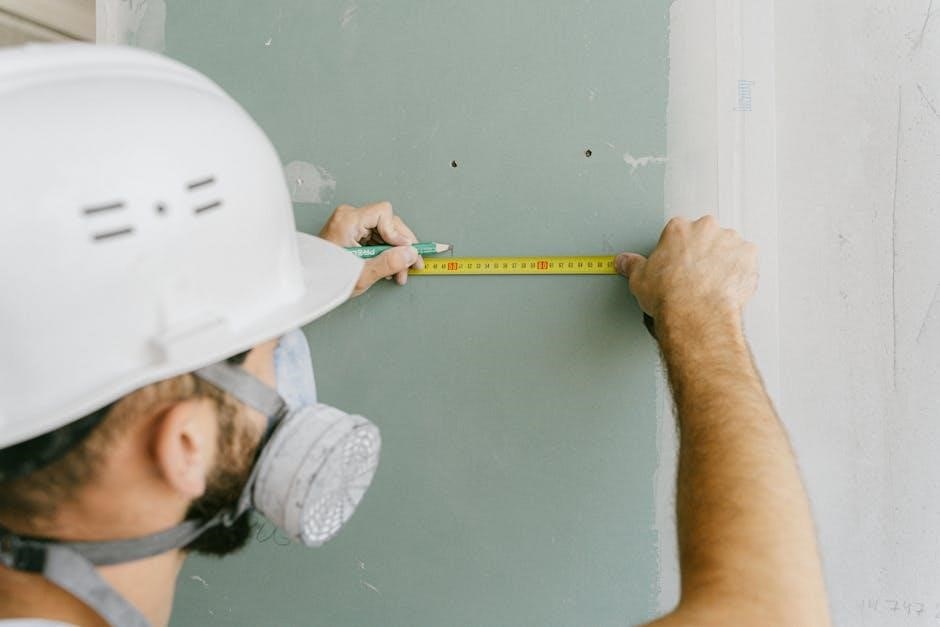
Planning and Measuring for Drywall Installation
Planning and measuring are crucial for successful drywall installation. Calculate square footage and create detailed layout drawings for precise cuts and accurate material estimation‚ ensuring efficient results always.
Calculating the Square Footage of the Area
To determine the number of drywall panels needed‚ calculate the area by multiplying the length and width of each wall or ceiling. Standard drywall panels are 4×8 feet (32 sq. ft.) or 4×12 feet (48 sq. ft.). Measure each section separately‚ including doors and windows‚ and sum the total area. Add 10% to account for waste and cuts. Use a layout drawing to visualize the placement of panels‚ ensuring efficient use of materials and minimizing waste during installation.
Creating a Layout Drawing for Accurate Installation
A detailed layout drawing ensures precise drywall placement‚ minimizing waste and errors. Begin by measuring the area‚ marking walls‚ ceilings‚ and any obstacles like doors or windows. Use grid lines or symbols to represent panels‚ studs‚ and other key elements. Plan the placement of drywall sheets to align with studs‚ ensuring proper fitment. Include notations for cuts‚ openings‚ and seams. This visual guide helps in organizing materials and labor efficiently‚ ensuring a smooth installation process from start to finish.
Drywall Installation Process
The drywall installation process is systematic‚ requiring precise measurements and alignment. Use guide marks for accurate cuts and placements. Essential tools like utility knives and T-squares ensure professional results.

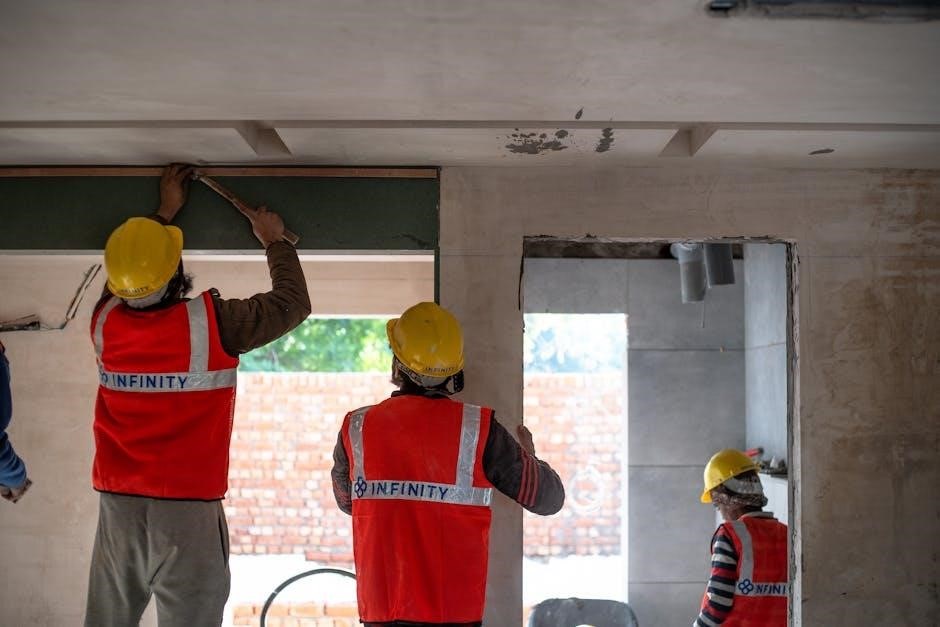
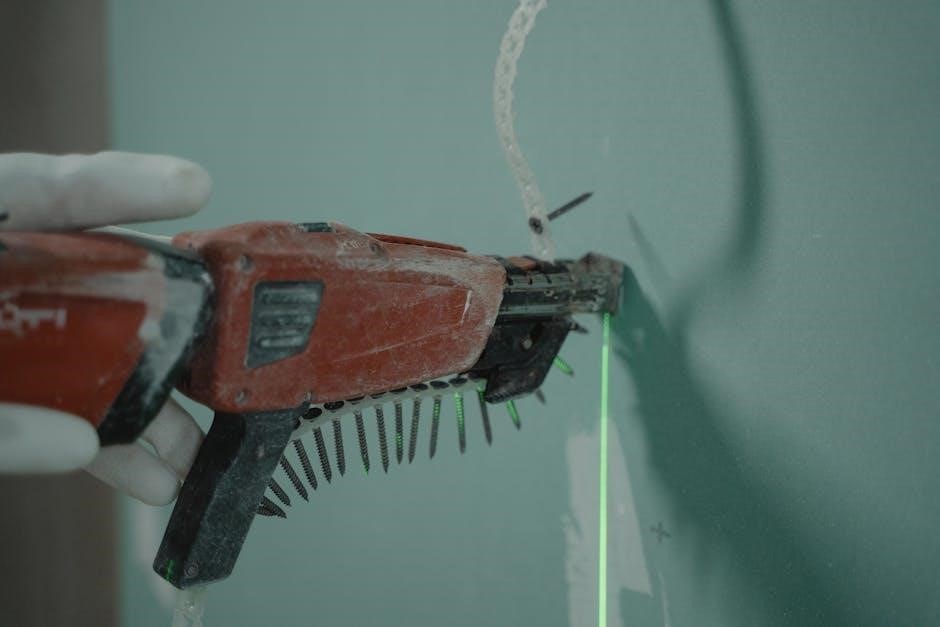
Step-by-Step Guide to Hanging Drywall Boards
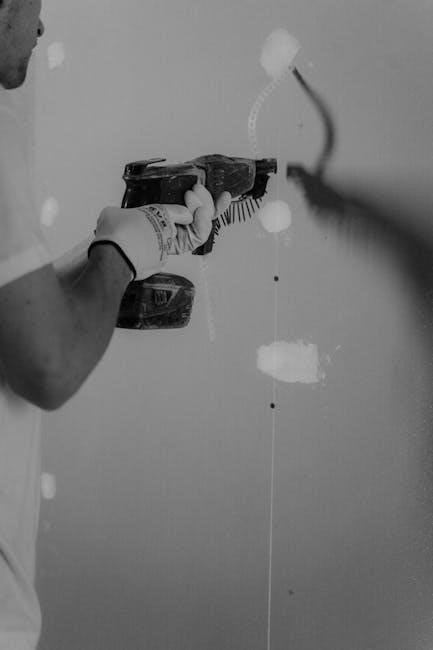
Start by measuring the area and calculating the number of boards needed. Use guide marks on drywall panels for precise cuts‚ ensuring accurate placements. Score the paper backing with a utility knife‚ then snap the board to create clean edges. For electrical outlets and windows‚ cut carefully using a T-square or guide. Handle panels safely to avoid damage. Attach boards to studs using drywall screws‚ spacing them 6 inches apart on walls and 12 inches on ceilings. Ensure screws are snug but not over-tightened. Apply joint tape and compound to seams for a seamless finish. Use specialized tools like the STAS drywallXpress for efficient hanging systems.
Attaching Drywall to Walls and Ceilings
Align drywall panels with studs‚ ensuring edges meet securely. Use drywall screws spaced 6 inches apart on walls and 12 inches on ceilings. For ceilings‚ start from the center and work outward to avoid buckling. Use guide marks on panels for precise screw placement. For electrical outlets‚ cut carefully around boxes using a utility knife or T-square. Ensure panels fit snugly around windows and doors‚ sealing gaps with joint tape. Use specialized tools like the STAS drywallXpress for efficient hanging systems. Tighten screws firmly but avoid over-tightening to prevent damage.
Handling and Cutting Drywall
Use a utility knife or T-square for precise cuts in drywall panels. Guide marks on panels ensure accurate cuts without additional tools. Handle panels carefully to avoid damage.
Techniques for Cutting Drywall Efficiently
Use a utility knife or drywall saw for clean cuts. Score deeply through the paper and gypsum‚ then snap the panel along the cut. For curved cuts‚ use a jigsaw. Always cut on the face side to avoid tearing the paper backing. Use guide marks printed on panels for accurate cuts. Make multiple passes with the knife for thicker sections. Sand edges for smoothness. Wear safety gloves and eyewear to prevent injuries. Ensure tools are sharp for precise cuts and minimal waste. Practice on scrap material to refine your technique for professional results.
Using Guide Marks for Accurate Cuts
Drywall panels often feature GridMarX guide marks‚ printed on the surface‚ to simplify cutting. These marks align with standard building dimensions‚ helping identify fastener lines and studs. Use a straight edge or T-square to guide your utility knife‚ ensuring precise cuts. Make 3-4 passes to cut deeply through the gypsum core without tearing. These marks eliminate the need for measuring lines‚ saving time and reducing errors. Refer to manufacturer guides for specific instructions on utilizing these marks effectively for accurate and efficient cuts during installation.
Finishing Drywall for a Smooth Surface
Apply joint tape and compound to seams‚ sanding smoothly. Prepare surfaces for paint or finishes by feathering edges and ensuring a flawless‚ even texture for a professional look.
Applying Joint Tape and Compound
Apply joint tape to drywall seams‚ pressing firmly to ensure adhesion. Use a putty knife to spread compound over the tape‚ feathering edges for a seamless finish. Sand lightly after drying. Avoid air bubbles by smoothing the tape thoroughly. For corners‚ use a corner bead and embed it in compound. Ensure all edges are sealed to prevent cracks. This process creates a smooth surface‚ ready for painting or further finishing. Proper application ensures durability and a professional appearance‚ as detailed in installation guides.
Sanding and Preparing for Paint or Finish
Sanding is crucial for achieving a smooth drywall surface. Use a fine-grit sandpaper (120-150 grit) to feather out edges and blend joints. Sand in circular motions‚ ensuring no scratches remain. Vacuum dust thoroughly before applying paint or finish. For optimal results‚ sand lightly between coats of compound if needed; Proper sanding ensures a professional finish‚ as detailed in installation guides. This step is essential for a seamless and durable final appearance‚ ready for painting or additional finishes.

Specialized Drywall Installation
Specialized drywall installation includes fire-rated gypsum boards for enhanced safety and soundproofing solutions to minimize noise transmission. These applications require precise techniques and materials for optimal performance.
Installing Fire-Rated Gypsum Board
Fire-rated gypsum board is essential for enhancing fire resistance in construction. Ensure compliance with U.L. fire resistance requirements during installation. Apply sealant to cut edges and holes for maximum protection. Proper fastening techniques are critical to maintain fire integrity. Follow manufacturer guidelines for layering and spacing screws. Sealing gaps ensures optimal performance‚ making it a vital step in specialized drywall projects.
Soundproofing with Drywall
Soundproofing with drywall involves using specialized materials and techniques to minimize noise transmission. Resilient channels and acoustic insulation enhance sound reduction. Multiple layers of high-density drywall‚ combined with sound-dampening compounds‚ create effective barriers. Sealing gaps with acoustic sealants prevents sound leaks. Proper installation ensures maximum soundproofing efficiency‚ making it ideal for home theaters‚ music rooms‚ and commercial spaces. Follow specific manufacturer guidelines for optimal results.

Additional Resources and Downloads
Download detailed drywall installation guides and manuals from leading manufacturers like Knauf and Siniat. These resources offer step-by-step instructions‚ technical specifications‚ and expert tips for flawless drywall projects.
Where to Find Detailed Drywall Installation Guides
Discover comprehensive drywall installation guides on manufacturer websites like Knauf and Siniat. These resources offer downloadable PDF manuals‚ step-by-step instructions‚ and technical specifications. They cover various aspects‚ from basic installation to specialized applications‚ ensuring a professional finish. Additionally‚ platforms like CertainTeed and Gyprock provide detailed guides tailored to different projects‚ making it easy to find the information you need for successful drywall installation.
Downloadable PDF Manuals and Manufacturer Instructions
Manufacturer websites like Knauf and Siniat offer downloadable PDF manuals for drywall installation. These guides provide detailed step-by-step instructions‚ technical specifications‚ and best practices. They cover topics such as material selection‚ cutting techniques‚ and finishing methods. Additionally‚ resources like the Gyprock and CertainTeed installation guides are available‚ ensuring professionals and DIYers can achieve a flawless finish. These manuals are essential for mastering drywall installation and ensuring compliance with industry standards.